
Altium Library Loader FAQ
The following are Frequently Asked Questions regarding the Altium Library Loader.
1. Why am I receiving one of the following errors when trying to ADD TO DESIGN?
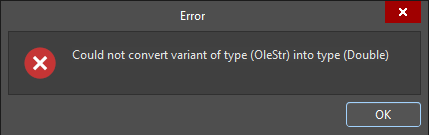
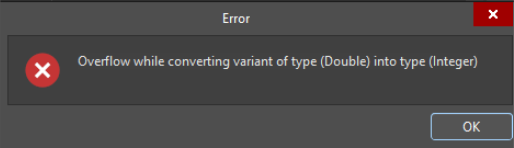
Download and install the latest version from https://altium.componentsearchengine.com/ga/downloads.php
2. Why am I receiving a “Path not found” error after performing a search?
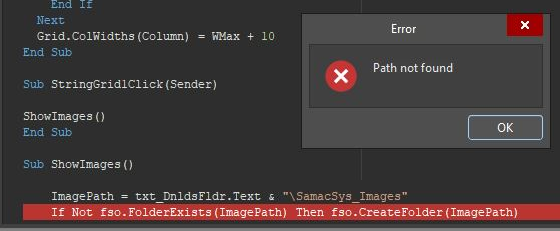
Download and install the latest version from https://altium.componentsearchengine.com/ga/downloads.php
3. After installation, why do I not see the menu option “Symbols | Footprints | 3D Models” under the File or Tools menu?
Firstly, you must be running a supported version of Altium Designer i.e. 17 or later. If you have an older version of Altium Designer then you must uninstall the Altium Library Loader.
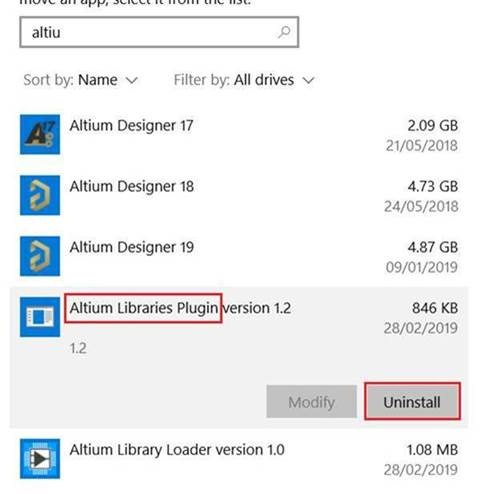
If you have the legacy “Altium Libraries Plugin” installed.
What you need to do is first close Altium Designer then uninstall the Altium Libraries Plugin as shown below. Finally, reinstall the Altium Library Loader (no need to uninstall first) and you should get a message during the installation about making a backup copy of the file DXP.RCS which is being modified to customise the menu options. On re-launching Altium Designer, you should now see “Symbols | Footprints | 3D Models” in the File and Tools menu. Note: These menus are dependent on what you have open/active i.e. Nothing, SchDoc, PcbDoc, SchLib or PcbLib.
If you do not have the legacy “Altium Libraries Plugin” installed.
This would mean that the DXP.RCS file is not getting updated by the installer or it may have been installed under a different account e.g. Administrator.
To customise the File menu when you have a SchDoc open please follow these steps:
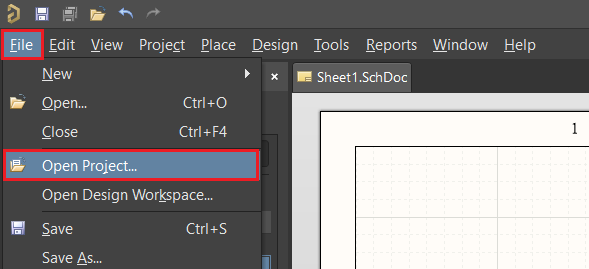
1. Select Open Project… from the File menu in Altium Deisgner 17 or later.
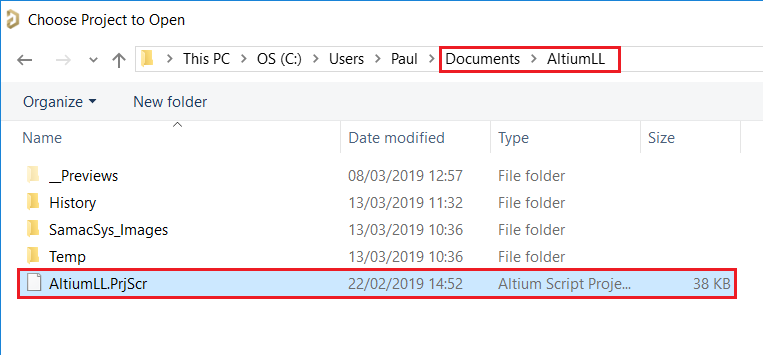
2. Open the AltiumLL.PrjScr Script Project file found in the AltiumLL folder of your Documents directory.
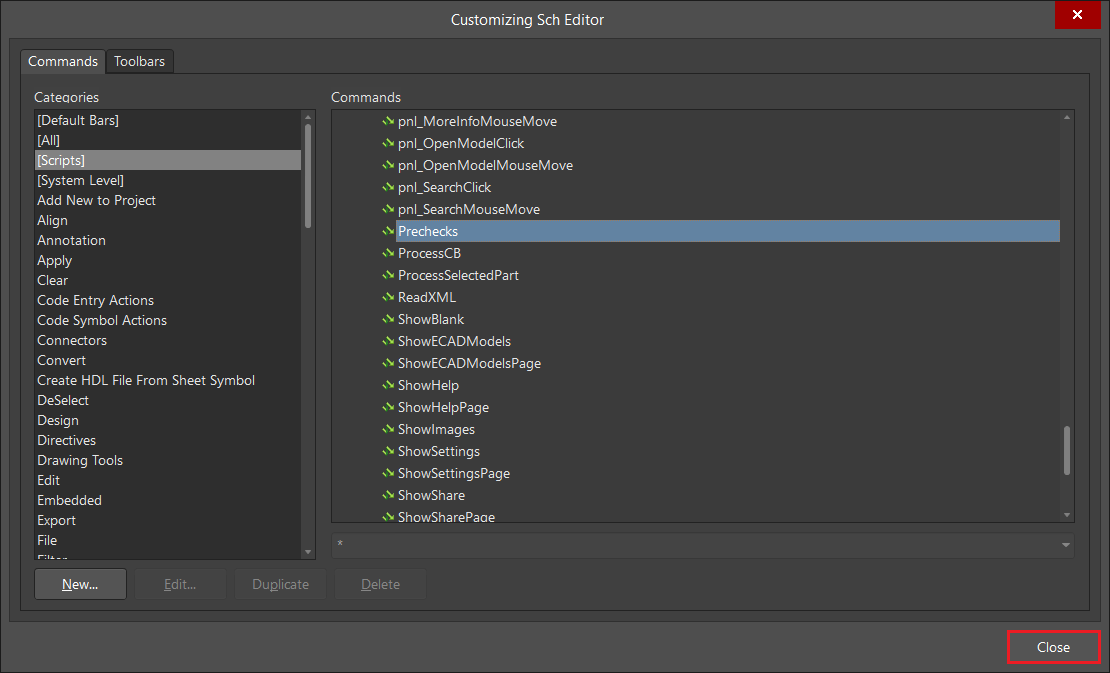
3. Making sure that you have a SchDoc open and active, click your Right Mouse Button on the menu bar as indicated by the red circle and then select Customize…
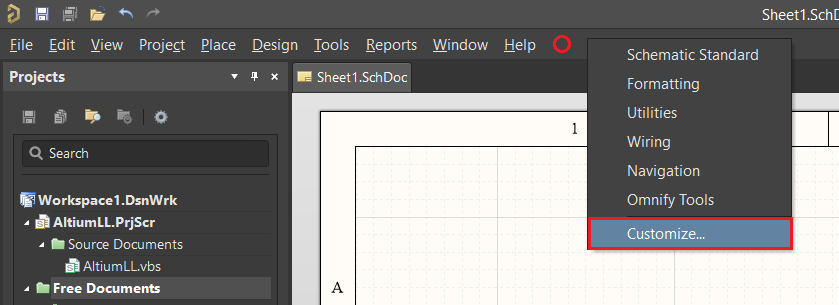
4. Click on Scripts under the Categories and then click and drag the Prechecks Command to the File menu as indicated by the red arrow.

5. Type “Symbols | Footprints | 3D Models” as the Caption and then browse to the SamacSys.png in the AltiumLL folder of your Documents directory for the Bitmap File. Then click OK
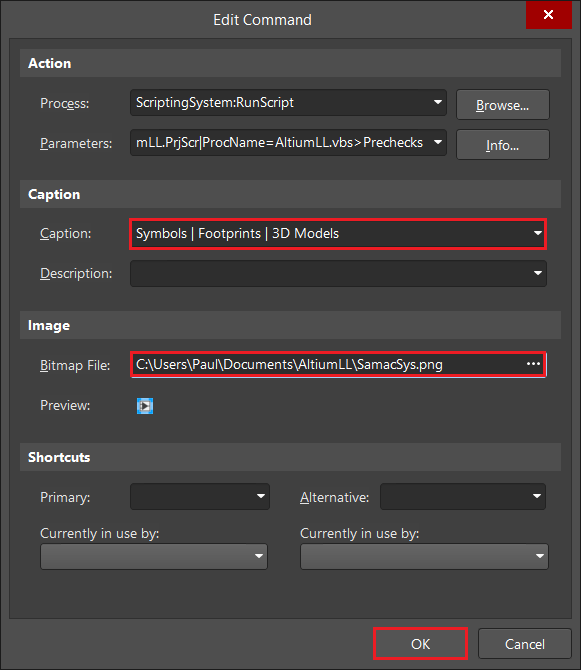
6. Close the Customizing Sch Editor dialog.
7. You will now have the menu option “Symbols | Footprints | 3D Models” under the File menu when you have a SchDoc file open and active.

4. Why am I getting one of the following errors when I attempt to launch Altium Library Loader?
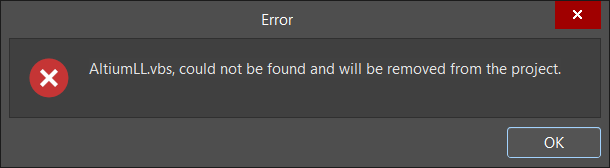
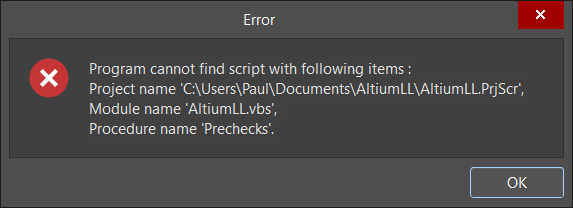 The AltiumLL.vbs file which is installed as part of the Altium script project is being picked up by your Antivirus software and quarantined. This is a false positive detection of VBS.ObfDldr.8.Gen or Trojan:Script/Foretype.A!ml and you should add an exclusion for this file and/or the folder C:\Users\<Username>\Documents\AltiumLL
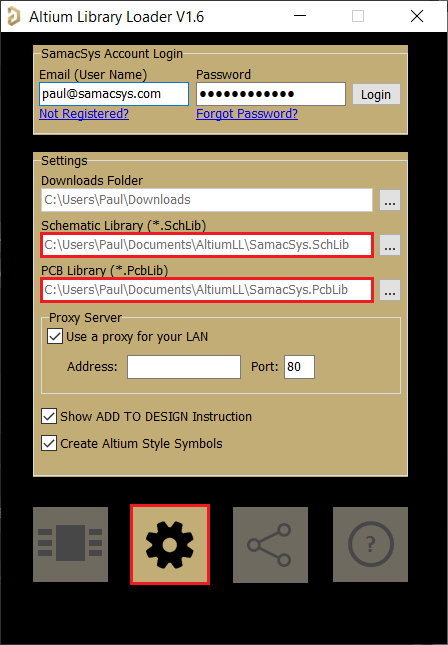
5. Why am I getting the following error when I attempt to click ADD TO DESIGN?
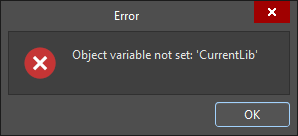
This error is typically seen if the Schematic and/or PCB Libraries are not set. Please check the Settings, and make sure that the Schematic and PCB Library files (*.SchLib and *.PcbLib) are present and correct. These are the default installed libraries which contain the symbols and footprints respectively:
6. Why can I not find where Altium Library Loader is installed?
Altium Library Loader is installed under the users Documents folder i.e. C:\Users\{Username}\Documents\AltiumLL\
Please note that if Altium Library Loader was installed under a different users account e.g. Administrator, then you will need to copy the AltiumLL folder to your own documents folder. Then you will need to follow the instruction under FAQ No. 3 to make the menu pick available in Altium Designer.